There are some things, particularly with Exchange, that can still only be done by PowerShell. Flow can call these PowerShell jobs via an Automation account. I used this at a client years ago, and since then setting it up has become more challenging shall we say.
My use case was to turn in Litigation Hold in Exchange (and add to distribution groups), tasks only accomplished by PowerShell.
So, this requires a runbook within an Azure automation account, which provides an endpoint to be called from Flow, using a built in action.
The subscription, resource Group and automation account will be known from where the automation account was created. In the below, I’m passing in a parameter, and waiting for the job to return an output.

Create an Automation Account
Go to Azure Automation and Create a new one:
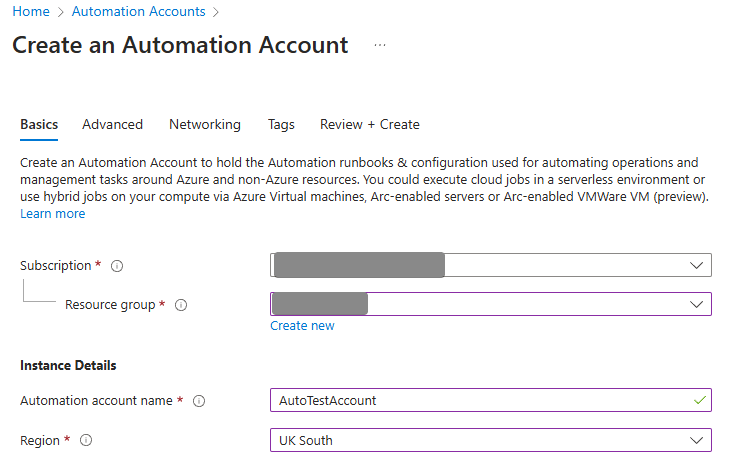
Now it’s all Managed Identities, I use System Assigned
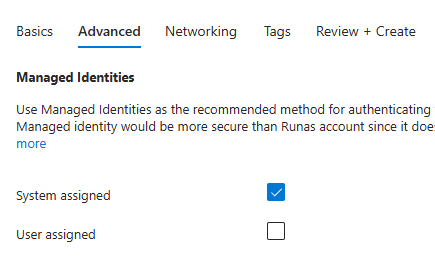
The rest can be defaults. Open your new automation account. Go to Runtime Environments in Process Automations, and create a new one, using PowerShell version 5.1. (PowerShell 7.x does not seem to work well with Exchange online).

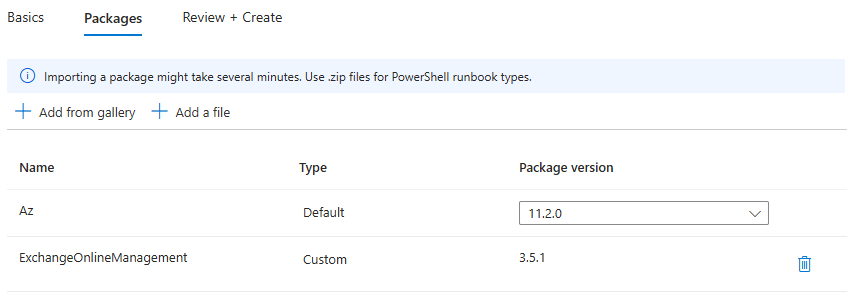
Go to Packages, and add (from gallery) here Exchange Online Management, selecting all the cmdlets unless you know what you are exactly doing ! It should look like this. Review and Create.
Set Up the Exchange Admin role for the Automation
Go to the Azure portal Roles, and search for exchange to bring up Exchange Administrator.

Click on Exchange Administrator, and click on Add Assignments. This is where the automation account will be added with Exchange privileges.

Select permanently assigned as this is a service account, or put in a date in 2 year’s time to confuse whoever comes after you !
Now comes the fun part…
Assigning Exchange.ManageAsApp Permissions
The MS Learn page on this is pretty good. What we need to do here is Step 4, but really all it requires is running this PowerShell script against your tenancy. I do it locally, but it can also be done from the terminal within the Azure Portal.
Pre requisite: Get the Identity Object ID from the Automation Account:
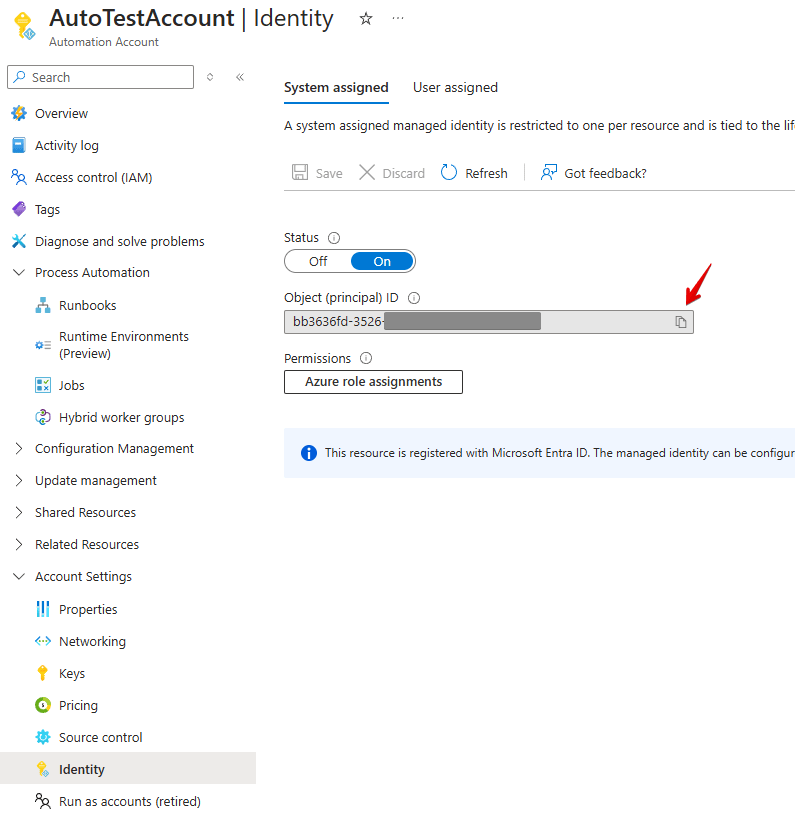
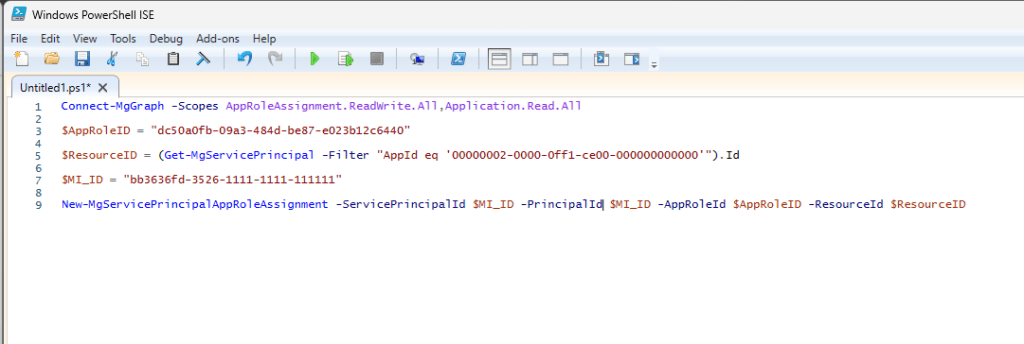
Grab this code and replace the $MI_ID variable with your object ID pasted from above:
Connect-MgGraph -Scopes AppRoleAssignment.ReadWrite.All,Application.Read.All

$AppRoleID = "dc50a0fb-09a3-484d-be87-e023b12c6440"

$ResourceID = (Get-MgServicePrincipal -Filter "AppId eq '00000002-0000-0ff1-ce00-000000000000'").Id

$MI_ID = "bb3636fd-3526-1111-1111-111111"

New-MgServicePrincipalAppRoleAssignment -ServicePrincipalId $MI_ID -PrincipalId $MI_ID -AppRoleId $AppRoleID -ResourceId $ResourceID
Open this in PowerShell ISE on Windows, and run the script; it will prompt you to sign into your tenancy, and add the Exchange Manage as App to the automation account.
Creating a Runbook
Now all is in place, time to create a runbook. Go to Process Automation / Runbooks and create:

Create with the runtime environment created earlier:

It will open in the code editor, so to test it out, paste in this code to connect to Exchange and print some Exchange info out. After entering, click on Test and remember to click Start! They take 30 odd seconds to be allocated and run.
$tenantDomain = "contoso.onmicrosoft.com" # Domain of the tenant the managed identity belongs to

Connect-ExchangeOnline -ManagedIdentity -Organization $tenantDomain

# debug to check connection
Get-AcceptedDomain | Format-Table -AutoSize
Now, just need to write some useful code.
Code to add to a distribution List:
The params are passed in from Flow.
Param(
    [string]$whichArea,
    [string]$addOrRemove,
    [string]$emailAddress,
    [Bool]$needsContact,
    [string]$userDisplayName
)

$tenantDomain = "contoso.onmicrosoft.com" # Domain of the tenant the managed identity belongs to

Connect-ExchangeOnline -ManagedIdentity -Organization $tenantDomain

# Create a new contact
if ($needsContact)
{
    if ($addOrRemove -eq "Add")
    {
        New-MailContact -Name $userDisplayName -ExternalEmailAddress $emailAddress -DisplayName $userDisplayName
    }
    elseif ($addOrRemove -eq "Remove")
    {
        Remove-MailContact -Identity $emailAddress -Confirm:$false
    }
}


#Add Member to Distribution Group
if ($whichArea -eq "abc")
    {
        $exchangeArea = "abc@contoso.co.uk"
    }
	elseif ($whichArea -eq "def")
    {
        $exchangeArea = "def@contoso.co.uk"
    }
	elseif ($whichArea -eq "ghi")
    {
        $exchangeArea = "ghis@contoso.co.uk"
    }

"The area used is $exchangeArea"
"The email used is $emailAddress"

#Add/Remove  user to/from Distribution Group
if ($addOrRemove -eq "Add")
{
    Add-DistributionGroupMember –Identity $exchangeArea -Member $emailAddress
}
elseif ($addOrRemove -eq "Remove")
{
    Remove-DistributionGroupMember –Identity $exchangeArea -Member $emailAddress -Confirm:$false
}
To turn on Litigation Hold:
Param(
    [string]$emailAddress
)

$tenantDomain = "contoso.onmicrosoft.com" # Domain of the tenant the managed identity belongs to

Connect-ExchangeOnline -ManagedIdentity -Organization $tenantDomain

# enable litigation hold
Set-Mailbox $emailAddress -LitigationHoldEnabled $true
1 Comment